The Fab Academy 2014
Digital Fabrication Laboratory. Department of Architecture.
Institute of Technology. EPS-CEU San Pablo CEU University
Adolfo Gutiérrez Sánchez
Architect
The Fab Academy 2014 Digital Fabrication Laboratory. Department of Architecture. Institute of Technology. EPS-CEU San Pablo CEU University |
Adolfo Gutiérrez Sánchez Architect |
|||
| Home | Portfolio | Files | ||
| COMPUTER-CONTROLLED MACHINING |
|
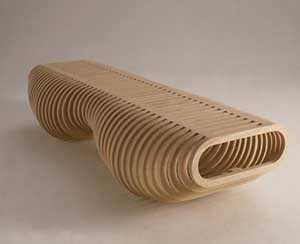
The assignment The assignment for this week was design something to be cut ina computer-controlled machine. I had something in mind from the beggining of the course, and as I did not have the deisgn of my final project and I could not apply the asignment for my project yet, I decided to build something productive for myself. I designed a bench I knew, the Infinity Bench original design from Carl Fredrik Svenstedt, but I ahve always loved this bench and I wanted tp have one for myself. The design was very simple, but I was a little bit worried about the construction, as building this piece in real wood was not as easy as the models I am used to. |
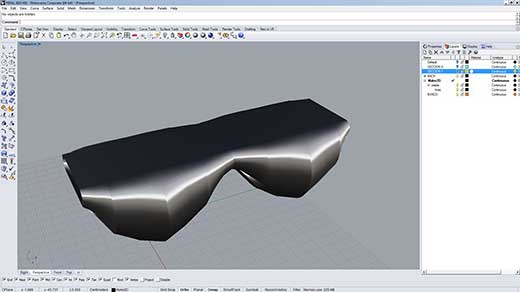
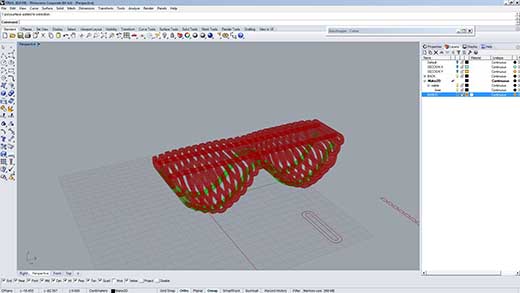
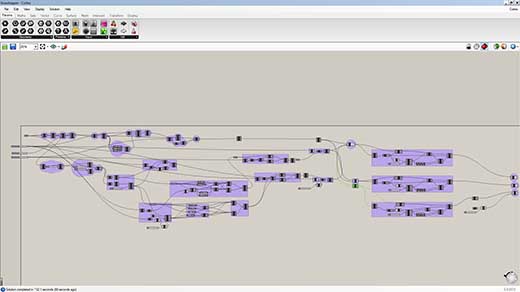
The bench design 1. I started designning the bench with Rhino. The design was pretty simple, once I have done the sections that will conform the shape of the bench, I just did symmetry so it becomes a symmetric bench for two persons and do a loft along the all sections so I get the whole shape of the bench. 2. Done that, I started a Grasshopper file. The simplest thing to do this sections was actually to use the Autodesk software 123D Make, but I was used using Grasshopper a few years ago and I wanted to feel as comfortable as I was used before, so I tried to do the full definition of the sectioning prametrically so in case I had to do any changes I could do it directly on screen and cut it again. There are several definitions on internet with this process, but I wanted to do it myself. 3. The last part of the design was to make sure that the given sections of Grasshopper were correctly assembled. I have worked with this type of shapes and they sometimes give some errors in the construction, specially in the rounded shapes coloured in green in the image below. |
 |
 |
 |
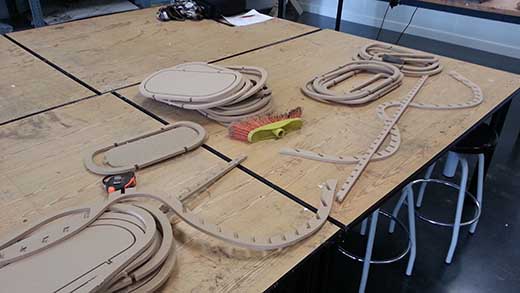
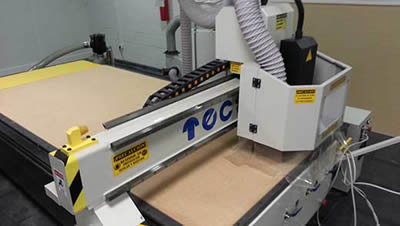
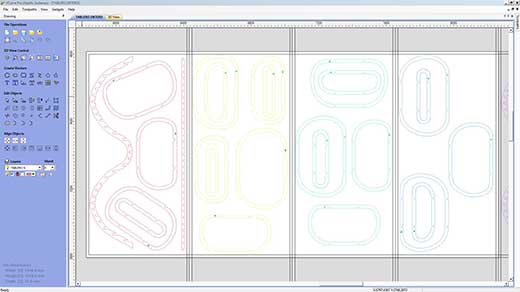
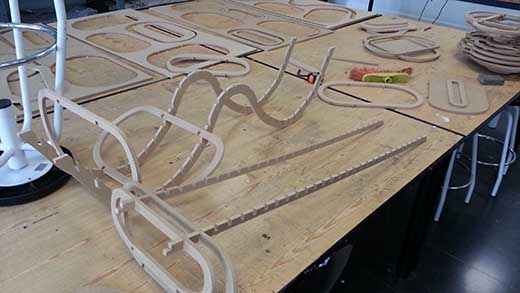
Buying the material The wood is pretty expensive, and for a first try of constructing this prototype I did not want to spend a lot of money in something that I may not construct. I am now working in a construction Architecture Studio, and I have now some discounts in construction elements! Yuhu!! So I went to a shop specific for constructors and bought two boards of MDF of 2440x1220 mm that is the machimum size of our CNC machine in our university. The day before cutting I had a instruction session with my instructor of the university as the process is pretty simmilar to the laser cutting, but the tolerances of the machine is very different as they depend of the mill you want to use. We can see some tutorials in the following link. Once I know how to use the machine and the software to send the files into it, I can prepare the file perfectly so the final milling is as fast as possible. |
 |
|
||||
 |
 |
|||
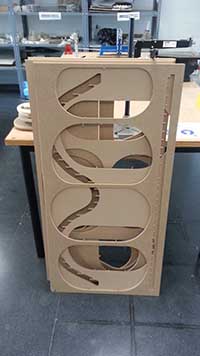
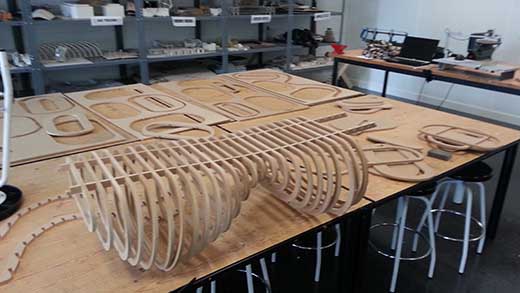
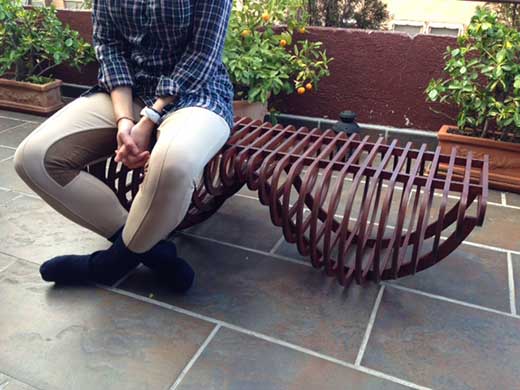
The assembly The first thing after cutting all the pieces was to ordering all of them in order of appearence in the assembly. I could not mill any number in the pieces as I did not want it to appear. I wanted all the pieces perfectly clean and polished. It took a pretty nice time as all the sections were millled in different sequence in order to fit as much as possible in the different boards. I noticed that I had some errors in the design of the bottom piece (as expected). The curved sections are difficult to fit in Grasshopper, I have noticed in many times that I have done this models, so the solutions was actually to mill the new two sections before designing them manually. Once I did that, it fit perfectly and the assembly was pretty easye from this point. I realized that the bench look pretty nice, but the MDF wood was not as pretty as the white wood of the Infinity Bench of Carl Fredrik Svenstedt. I wanted the bench to be used by me, not just a piece of wood that will become useless, so I decided to varnish the piece so it can be used for a long time. |
 |
 |
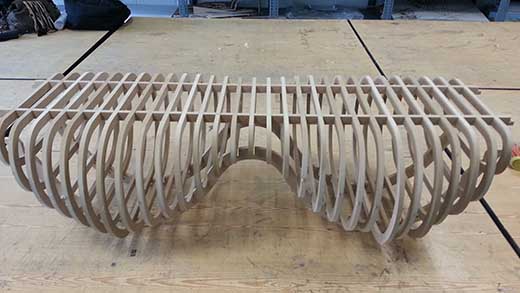 |
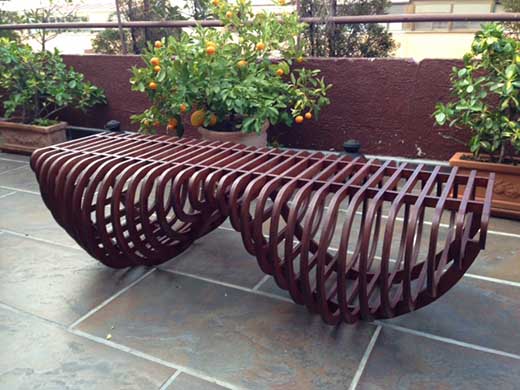
The final touches Even the original design was not mine, I wanted the bench to be used and to last in time. It took me much more time than expected, but the result was really nice. I varnished two times so it could resist the cold, rain and sun. After finishing it, it was the time to try it. Even it was perfectly assembled, I realized that it would not resist a person, and of course not two persons seated on it. The MDF wood is very cheap, but it has very low resistant and it breaks pretty easily. I decidied that the best way it to last was actually not using it as a bench but use it as a table where I could put my TV or some drinks doing a party. |
|
 |
 |